Maybe it’s an embellished brooch, or a knitted shawl? We all have family heirlooms we just aren’t sure what to do with. I feel so honored to have piece of my families past, but that doesn’t mean it is a no brainer on where and when to wear them.
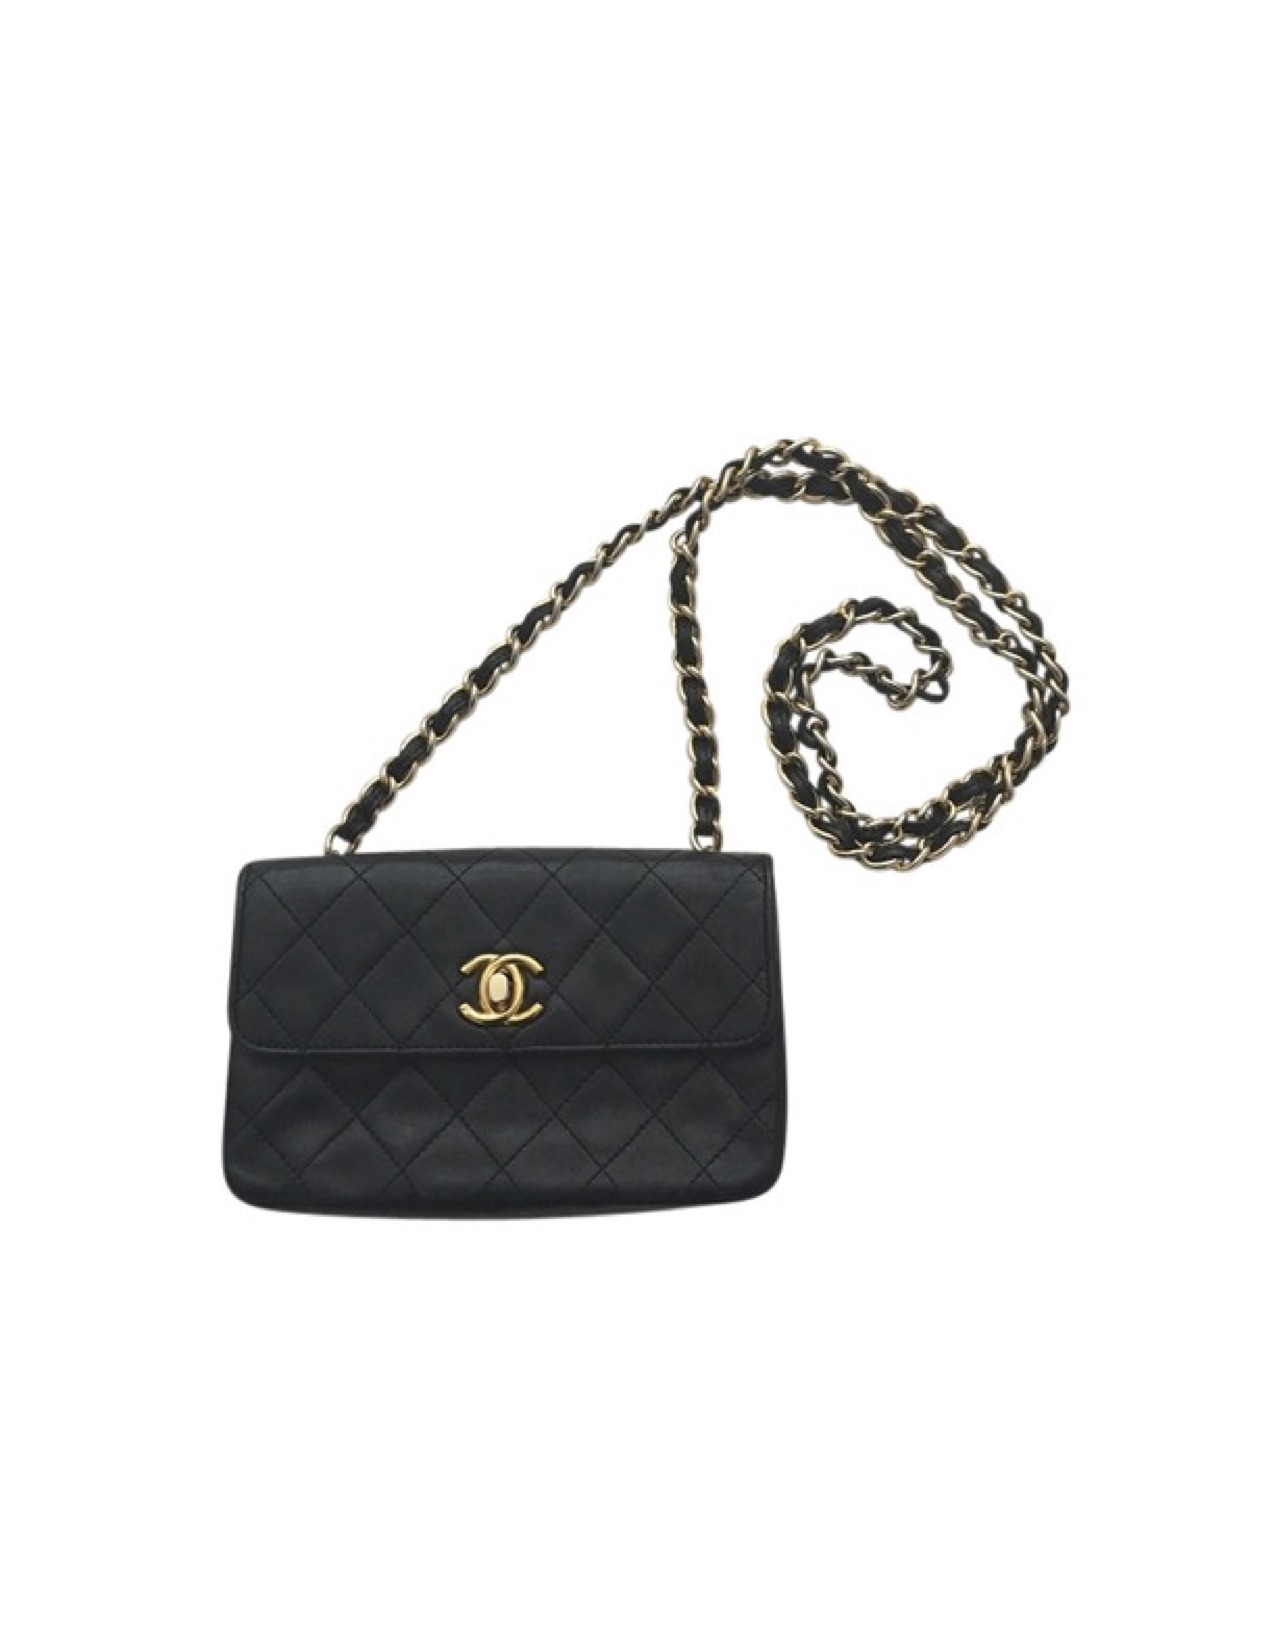
Upon her death, my grandmother gifted me her rare Chanel cross body bag which has become a weekly staple for my wardrobe. Fine accessories like this need no introduction; they speak in their timeless appeal. Estate sales are a great place to shop for these types of stately treasures as well if you don’t have a relative to bless you with this kind of thing.
Gram also gave me a stunning, lace scarf that is too dainty to be tied around my neck. I have opted to tie it to my handbag on occasion or style it wrapped around a stack of antique books in my bathroom.
So here are a few other tips to keep the tradition going.
Is it a ornamental pin you are struggling with? Yes, they are so beautiful, with rhinestones and pearls… sitting on your bathroom counter. You do not need to feel intimidated by the idea of a brooch. They don’t have to be pinned to a 1950’s wrap or a mink stole. Instead pin it to a link chain or a swede strap to turn it into a necklace.
Or have you been lucky enough to get your moms wedding dress? Just aren’t sure what to do with those big ol’ sleeves? A really great way to share that moment with your mom, but keep your day modern and on point with your own personal style, is to add the lace of her dress into the design of your own. Upcycling {or creative reuse} for this special garment is like having a part of your mom with you while being true to yourself in your own style. You can also accent a hair pin with portions of the lace as well. It makes for a lovely hair accessory when you are having a bad hair day.
No matter the item always remember, you don’t have to be weary to pair the old with the new. Vintage is making a comeback after all!
Stylishly Yours,
Jen Young
https://foreverstyled.com/wp-content/uploads/2015/09/fs-logo.jpg00Jen Younghttps://foreverstyled.com/wp-content/uploads/2015/09/fs-logo.jpgJen Young2017-02-01 08:45:052017-02-01 06:15:38Fabulous Family Heirlooms
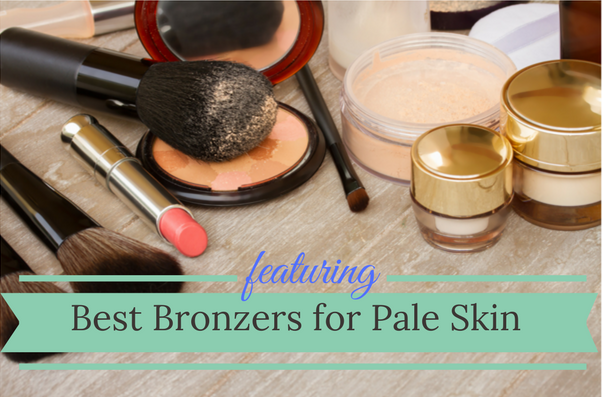
Let’s be honest, my “porcelain winter skin” often looks as though I have a major illness. Sometimes I am almost transparent especially in photographs, so I am thankful for a good bronzer to add the extra color I need when I’m my palest self.
So for you fair skinned ladies who need a change in your makeup routine, I’m about to make your dreams come true with some amazing bronzers for your skin. Believe me– it can be hard to find the perfect one! Until NOW!
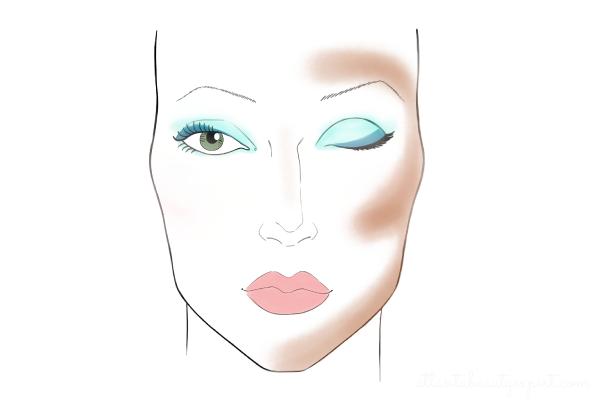
For the perfect application, glide your brush over the temples of your forehead, to under the cheek bones, back up to the top of your ear, and then under your jaw line. Drawing a “3” with bronzer will help slim your face as well as add the illusion of a healthy sun-kissed glow. You can also dust the bronzer on the both sides of the nose to make it look a smaller.
There are many bronzers to pick from, but finding ones for the fairer skin tone can be challenging. So I’ve picked out some of my favorite ones to use when you need to add an extra pop of color to your face. I would, however, definitely recommend going to my favorite beauty stores like Sephora or Ulta and try a tester so you can buy an option that is perfect for your skin tone.
Bronzers come in matte and shimmery finishes. Others have a duo blush combo built in while some come in super dark shades or for uber fair skin. So go try some of these brands and find your shade you feel happy in.
These products will make a huge difference in your makeup game.
Let me know of some of your favorite brands and bronzers if you have pale skin like me! Place your comments in the section below.
Stylishly Yours,
Jen Young
https://foreverstyled.com/wp-content/uploads/2015/09/fs-logo.jpg00Jen Younghttps://foreverstyled.com/wp-content/uploads/2015/09/fs-logo.jpgJen Young2017-01-23 11:00:372017-02-22 06:55:06Best Bronzers for Pale Skin
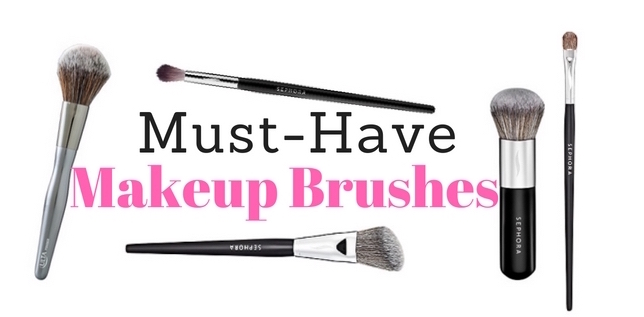
Just two weeks ago I did a blog post on Makeup Bag Essentials, so I figured it would be helpful to supplement that post with a special feature on “Must-Have Makeup Brushes.” Of course, you can’t successfully apply your makeup if you don’t have the right tools!
So let’s explore what brushes never leave my makeup bag–call them my holy grail of applicators. I’ve picked several basic necessities below I consider the best of the best featuring a few from the Sephora Collection, but you can find other substitutes and lookalikes brushes for a lesser cost elsewhere. I will say I NEVER skimp on brushes and consider them an investment. As long as you clean them on a regular basis with appropriate cleansing wipes or liquid cleaners, you can keep them on rotation for at least two to three years.
For all you DIY’ers, here is a recipe for making your own cleanser for your brushes as well: {Featured on Popsugar}
Step 1: Mix two parts antibacterial dish soap to one part of the extra-virgin olive oil on a clean plate (don’t use paper plate, as the oil will seep through).
Step 2: Grab your first brush and wet it slightly with lukewarm water. Make sure the brush stays bristle-side down throughout the entire process. If water gets into the ferrule (the middle tube part that holds everything together) of the brush, it can loosen the glue, causing the bristles to fall out.
Step 3: Dip the damp brush into the soap mixture and coat it thoroughly. Next, work the mixture into the bristles using the palm of your hand and fingers. Continue until the soapy residue is makeup free.
Step 4: Rinse the brushes under lukewarm water until no soap runs from the bristles.
Step 5: Roll a dish towel like you would a yoga mat, and drape a paper towel over it so that most of the paper towel hangs off. (The paper towel should look like a slide coming down from the dish towel). Next, arrange the brush so the top of the handle sits on top of the towel, pitching the rest of the brush down onto the paper towel. This will allow your brushes to dry on a slant, while keeping moisture away from the ferrule.
Repeat with remaining brushes. Some make take two washings to get completely clean, depending on the amount of residue left behind. Allow them to dry overnight, and repeat about once a month.
Here are my MUST HAVES:
Foundation Brush: To achieve that airbrushed and flawless face, you must use a foundation brush. I love the Sephora Collection but Bobbi Brown makes one that I also love. Apply a small amount of liquid foundation to the back of your hand; dip your brush into the foundation you squeezed out and then buff in circular strokes onto the face until you find the amount of coverage you want. Remember to start small and then build up gradually!
Powder Brush: To set all your foundation and concealer in place, use a fluffier brush to cover your whole face with powder. Apply the powder in broad, sweeping strokes all over the face to set coverage on the face. There are so many brands that make powder brushes so pursue your local beauty store to find one that feels good on your face. Take a look at some of the Chanel collection brushes that I adore!
Bronzer Brush: Another essential includes a Bronzer brush. Starting with the perimeter of the face, apply bronzing powder and blend inwards from the temple, the contour of the cheek, and the jawline. Bronzers can be temperamental in achieving the coverage you want so make sure you find a brush that is soft, dense, and fluffy. I love the IT Brushes from ULTA because of how soft the are!
Blush Brush: This staple brush is my favorite because it includes an angled shape making it easier to brighten and sculpt your facial features in a single gesture. Again you have to start light handed and then build your blush to your liking.
Eye Shadow Brush: If I had one brush I couldn’t live without it would be my Bobbi Brown Eye Sweep Brush. It makes putting on eyeshadow so easy and effortless and gives a beautiful result. This brush has soft bristles and a full, rounded shape to it. It’s really great for anyone looking to create a variety of eye makeup looks, from a dramatic smoky eye to subtle daytime shadow.
I trust and love everything about the Sephora Collection brushes as well as some gems from Chanel and Bobbi Brown. They make applying my makeup so easy and flawless!
What are your favorite brushes? Please share in the comments section below. Check out below some more great picks to have in your makeup bag!
When is the last time you gave your makeup bag a “refresh?” Just this week I was digging out a half-crumbled face powder from the bottom of my purse and it reminded me that it is just as important to have the basic makeup essentials as it is the proper wardrobe. If you are a make-up curator like my mom {who just gave me like 15 tubes of lip sticks she never wears and several other goodies…EEK!} or perhaps you never wear makeup at all…this post features the key essentials every woman should have in her makeup bag.
My morning makeup routine normally takes about 10 minutes, so here is the approach I take as I apply each core component:
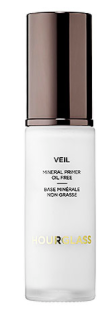
1.} Start with a dime size of Face Primer- There are many brands for all different skin types, but the Hourglass Veil Mineral Primer is The BEST. Using a primer sets your foundation so it won’t melt off during the day and produces a more even application.
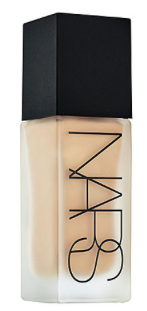
2.}Next, squirt a quarter size of your favorite liquid foundation into your hand and spread evenly on your face with a flat head brush. This Nars Luminous Weightless Foundation goes on naturally yet with plenty of coverage. I also dab a little on my upper eye area to ready my lids for eyeshadow. You can always dust your face with powder if you want more of a matte finish. Check out this post on Summer Foundations for other ideas as you explore what will work best for your skin tone and budget.
3.}Then, apply NARS Radiant Creamy Concealer under the eyes to reduce dark circles or puffiness, and around the nose area in the folds by the mouth. You can also touch up any acne spots as well. Blend with your index finger. If you don’t have time for a full liquid foundation application, stick to concealer touch ups and then top with your favorite powder.
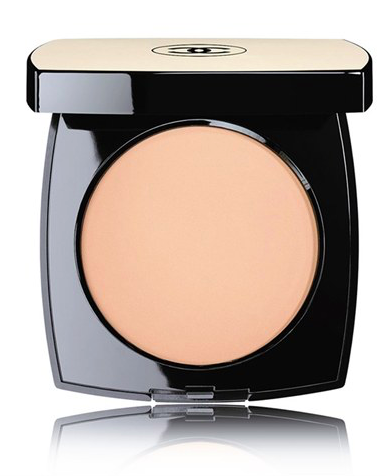
4.} Set your foundation and concealer with powder...my favorite is Chanel Healthy Glow Sheer Colour. Like I mentioned earlier, it is imperative to set the liquid makeup so it won’t run off or be sticky on your face throughout the day.
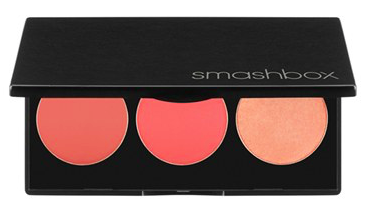
5.} Contour your cheek bones and the perimeter of your face with the perfect Bronzer/Blush/ Highlighter combo. This Smashbox Triple Pallet is easy to throw in your purse and is a space saver for your makeup bag. Weather you want to add a bronzed glow for the summer or in the dead of winter, this trio pallet has everything you need.
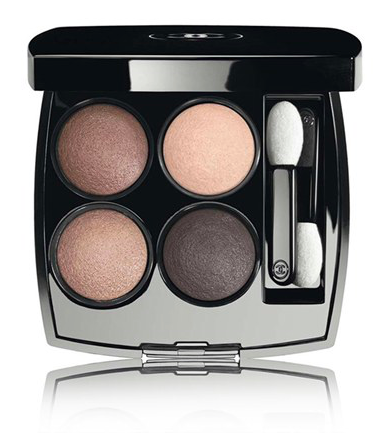
6.} I adore this neutral eye shadow pallet from Chanel. These four shadows give you’re eyes a pop of color from day to night. If you are more low maintenance…you can opt out of this step and simply apply mascara and be on your way. I do a layer of the lightest shade right under my brow line followed by the next darkest shade directly on the lid. I then take a brow brush and do a windshield wiper effect with warmest tone in the crease of my eye. You can blend the black shade lightly over your liner to get the smoky eye effect.
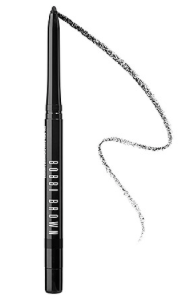
7.}Rim your lids with Bobbi Brown’s Perfectly Defined Gel Eyeliner. This will open up the eye area and make you look rested. What I love about this particular product is that NO sharpener is required and the dark brown shade goes great with every skin tone.
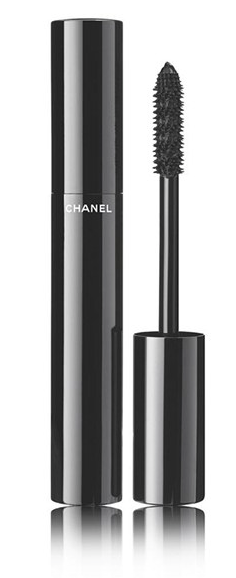
8.} Chanel Le Volume Mascarais the one beauty essential I cannot walk out of the house without whether heading to the gym or for work. Check out this recent post on other fabulous mascaras to consider depending on your lifestyle, budget, or eye effect you want to accomplish.
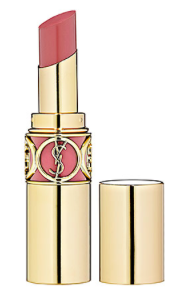
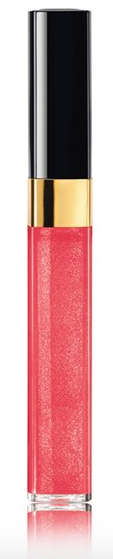
9/10.} Finish off your lips with a nuetral lipstick, gloss or BOTH. I adore both YSL’s Mauve Taupe shade topped with Chanel’s Wild Rose gloss. You can wear each shade together or separate depending on how you feel. I opt for gloss during the day for casual looks and the lipstick/gloss combo for evening attire.
Here are some more fun and cute makeup bags I’ve picked out as well to keep your goodies in. Take a look!
I hope this post motivated you to go through your makeup bag and make sure you have the core ingredients to make your face sparkle.
Let me know some of your favorite products!
Stylishly Yours,
Jen Young
https://foreverstyled.com/wp-content/uploads/2015/09/fs-logo.jpg00Jen Younghttps://foreverstyled.com/wp-content/uploads/2015/09/fs-logo.jpgJen Young2016-08-08 11:00:432016-08-08 11:00:43Makeup Bag Essentials

 Upon her death, my grandmother gifted me her rare Chanel cross body bag which has become a weekly staple for my wardrobe. Fine accessories like this need no introduction; they speak in their timeless appeal. Estate sales are a great place to shop for these types of stately treasures as well if you don’t have a relative to bless you with this kind of thing.